To create a new order in your WordPress admin, go to the Orders page and click the Add New button. You’ll see the following page:
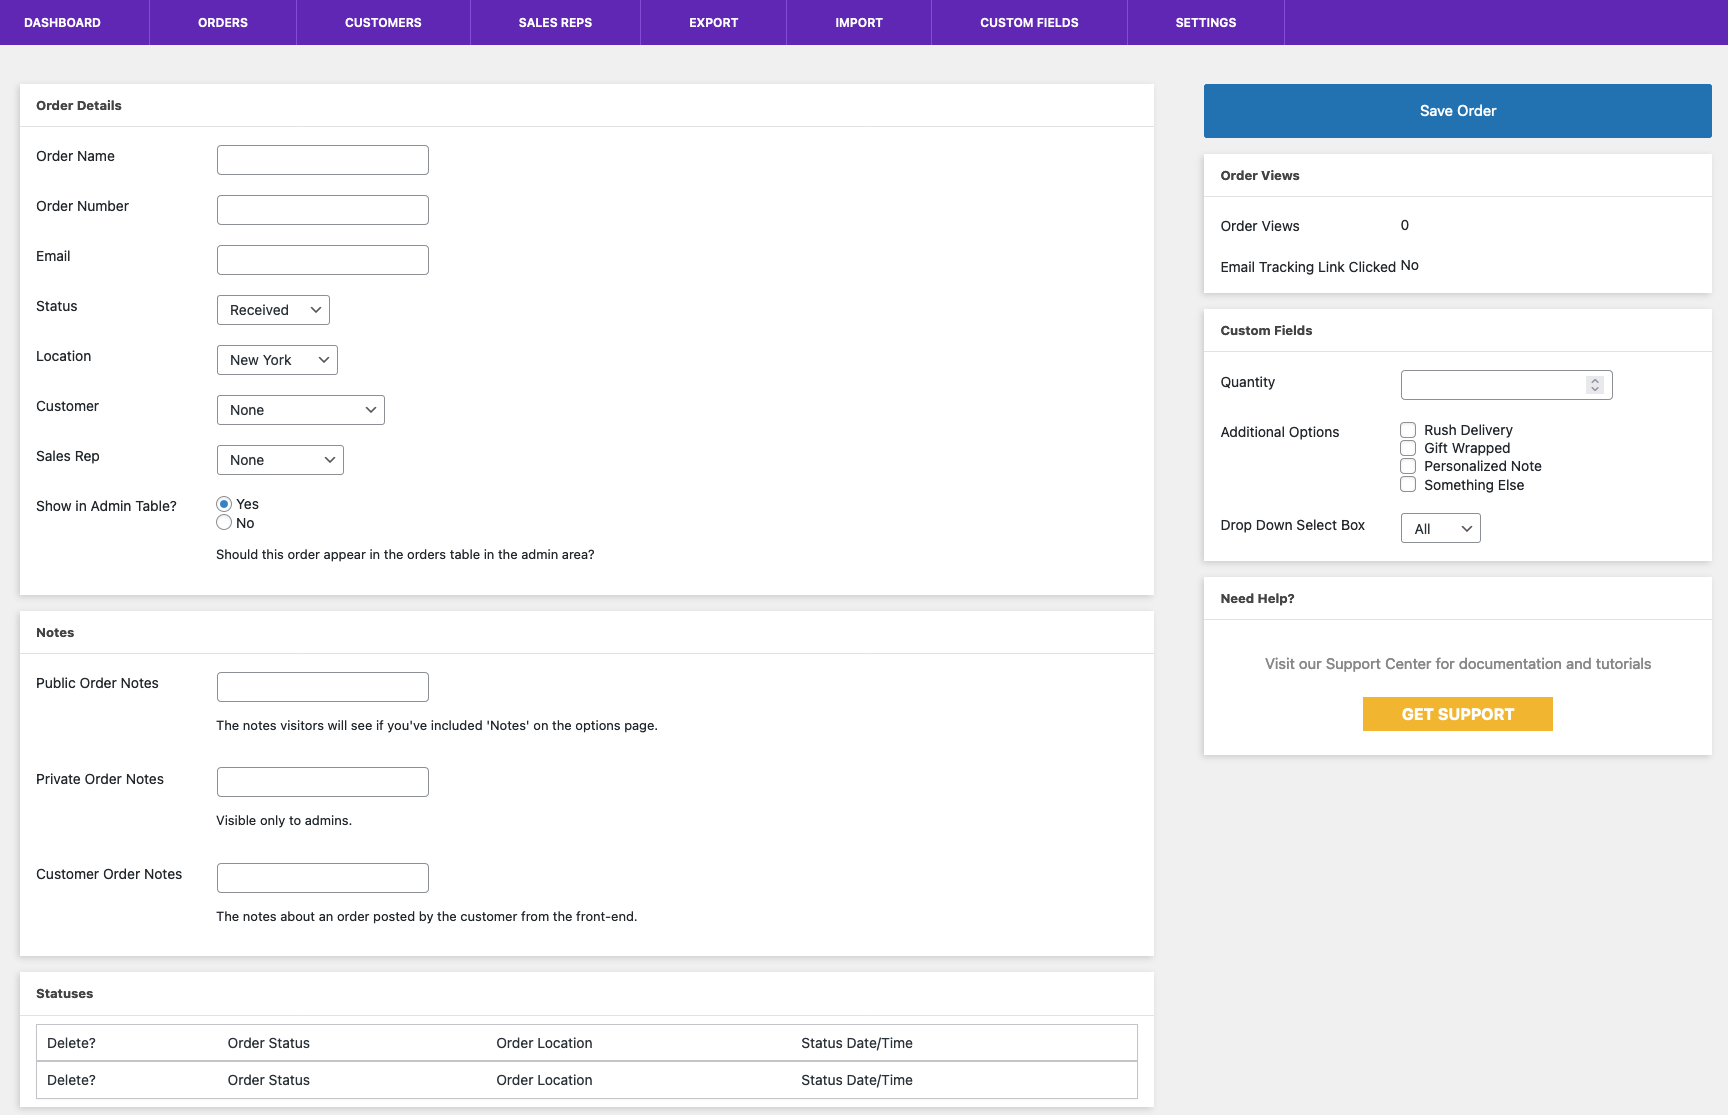
Start by filling in the Order Details section, which includes:
- Order Name
- Order Number: This is what will be used to track the order on the front end.
- Email: The email address associated with the order. This is where the status update notifications will be sent.
- Status: The current status of the order.
- Location: The current location of the order.
- Customer: You can use this to assign this order to a customer.
- Sales Rep: You can use this to assign this order to a sales rep.
- Show in Admin Table: Setting this to No is the same as hiding an order. It will not show on the Orders page unless you toggle on Include Hidden Orders.
The Notes section is where you can modify the public, private and customer order notes. Public and customer order notes are visible on the front end. Private order notes are only visible here and are for internal use.
The Statuses section shows all past statuses for this order. Here you can delete any statuses that you no longer want to display.
Once you click the Save Order button at the top, your order will be published.
Premium Features
If you have the premium version of the plugin, then, on the right of the order edit screen, you’ll see an extra section called Custom Fields where you’ll be able to fill in values for this order for each of the custom fields you have created. For more info about custom fields, please see here.