Custom fields can be used in several different ways in the plugin, including on tracking page and in the customer order form.
Assigning Custom Field Values to an Order
To assign a custom field value to a specific order, go to the Orders page and click on that order, to bring up the edit screen. You’ll find the Custom Fields section on the right.
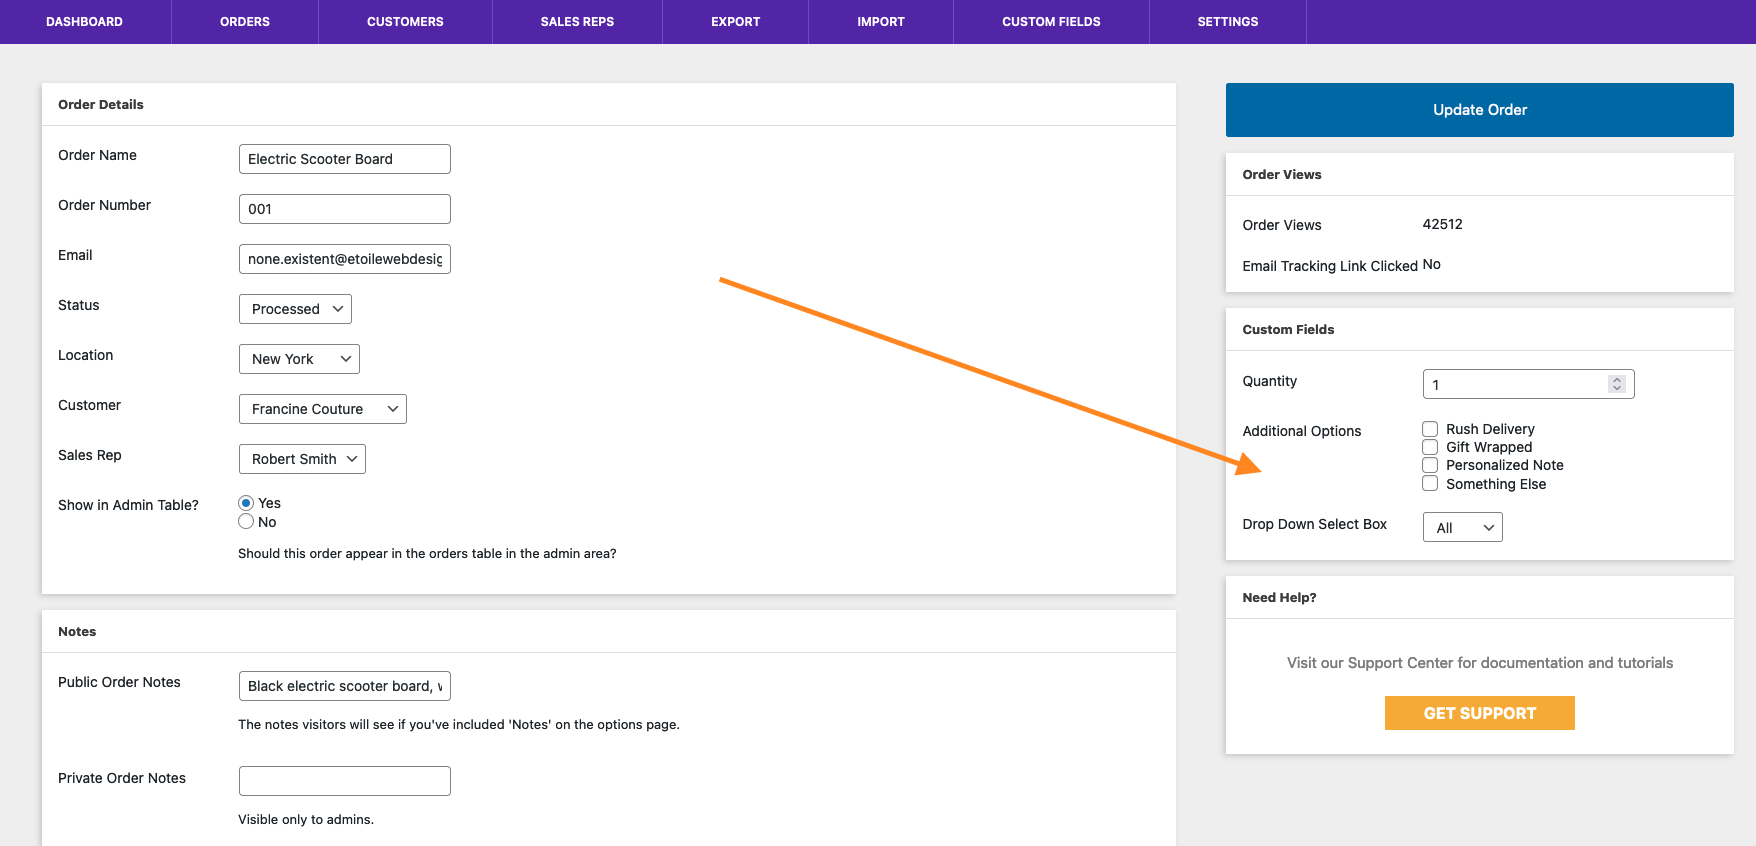
Here you will see a list of all the custom fields you have created, and you’ll be able to choose/specify a value for each. Notice how the type of input field varies according to the type you chose for the custom field.
Once you’ve assigned the values you want, make sure to click the Update Order button to save your changes.
Custom Fields on the Tracking Page
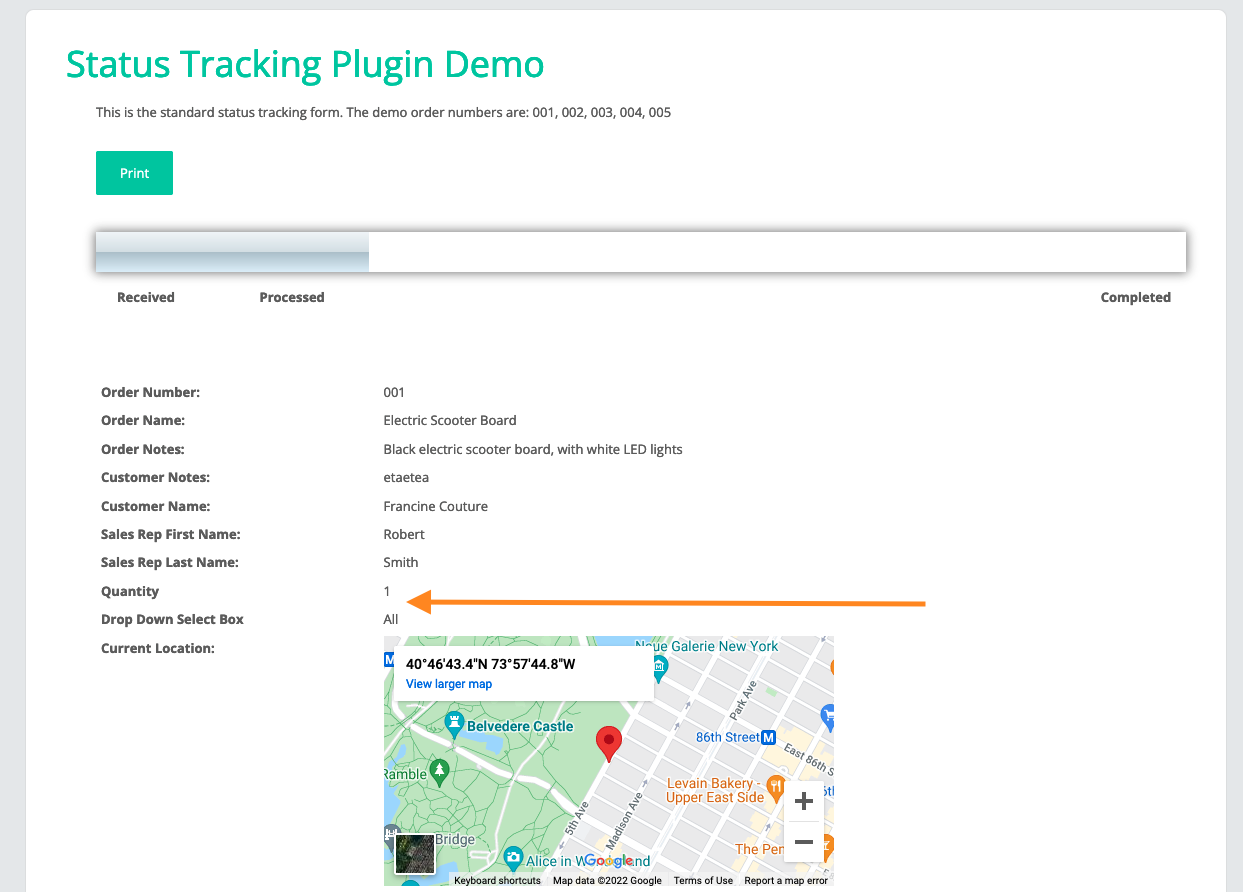
To show a custom field on the order tracking page, you need to make sure that you’ve assigned a value for the particular order you are tracking (as described above) and also that you’ve checked the Front-End Display? option for that custom field (as described here). Having done this, the custom field will now show as a label, with the field name, and the chosen value(s).
Custom Fields in the Customer Order Form
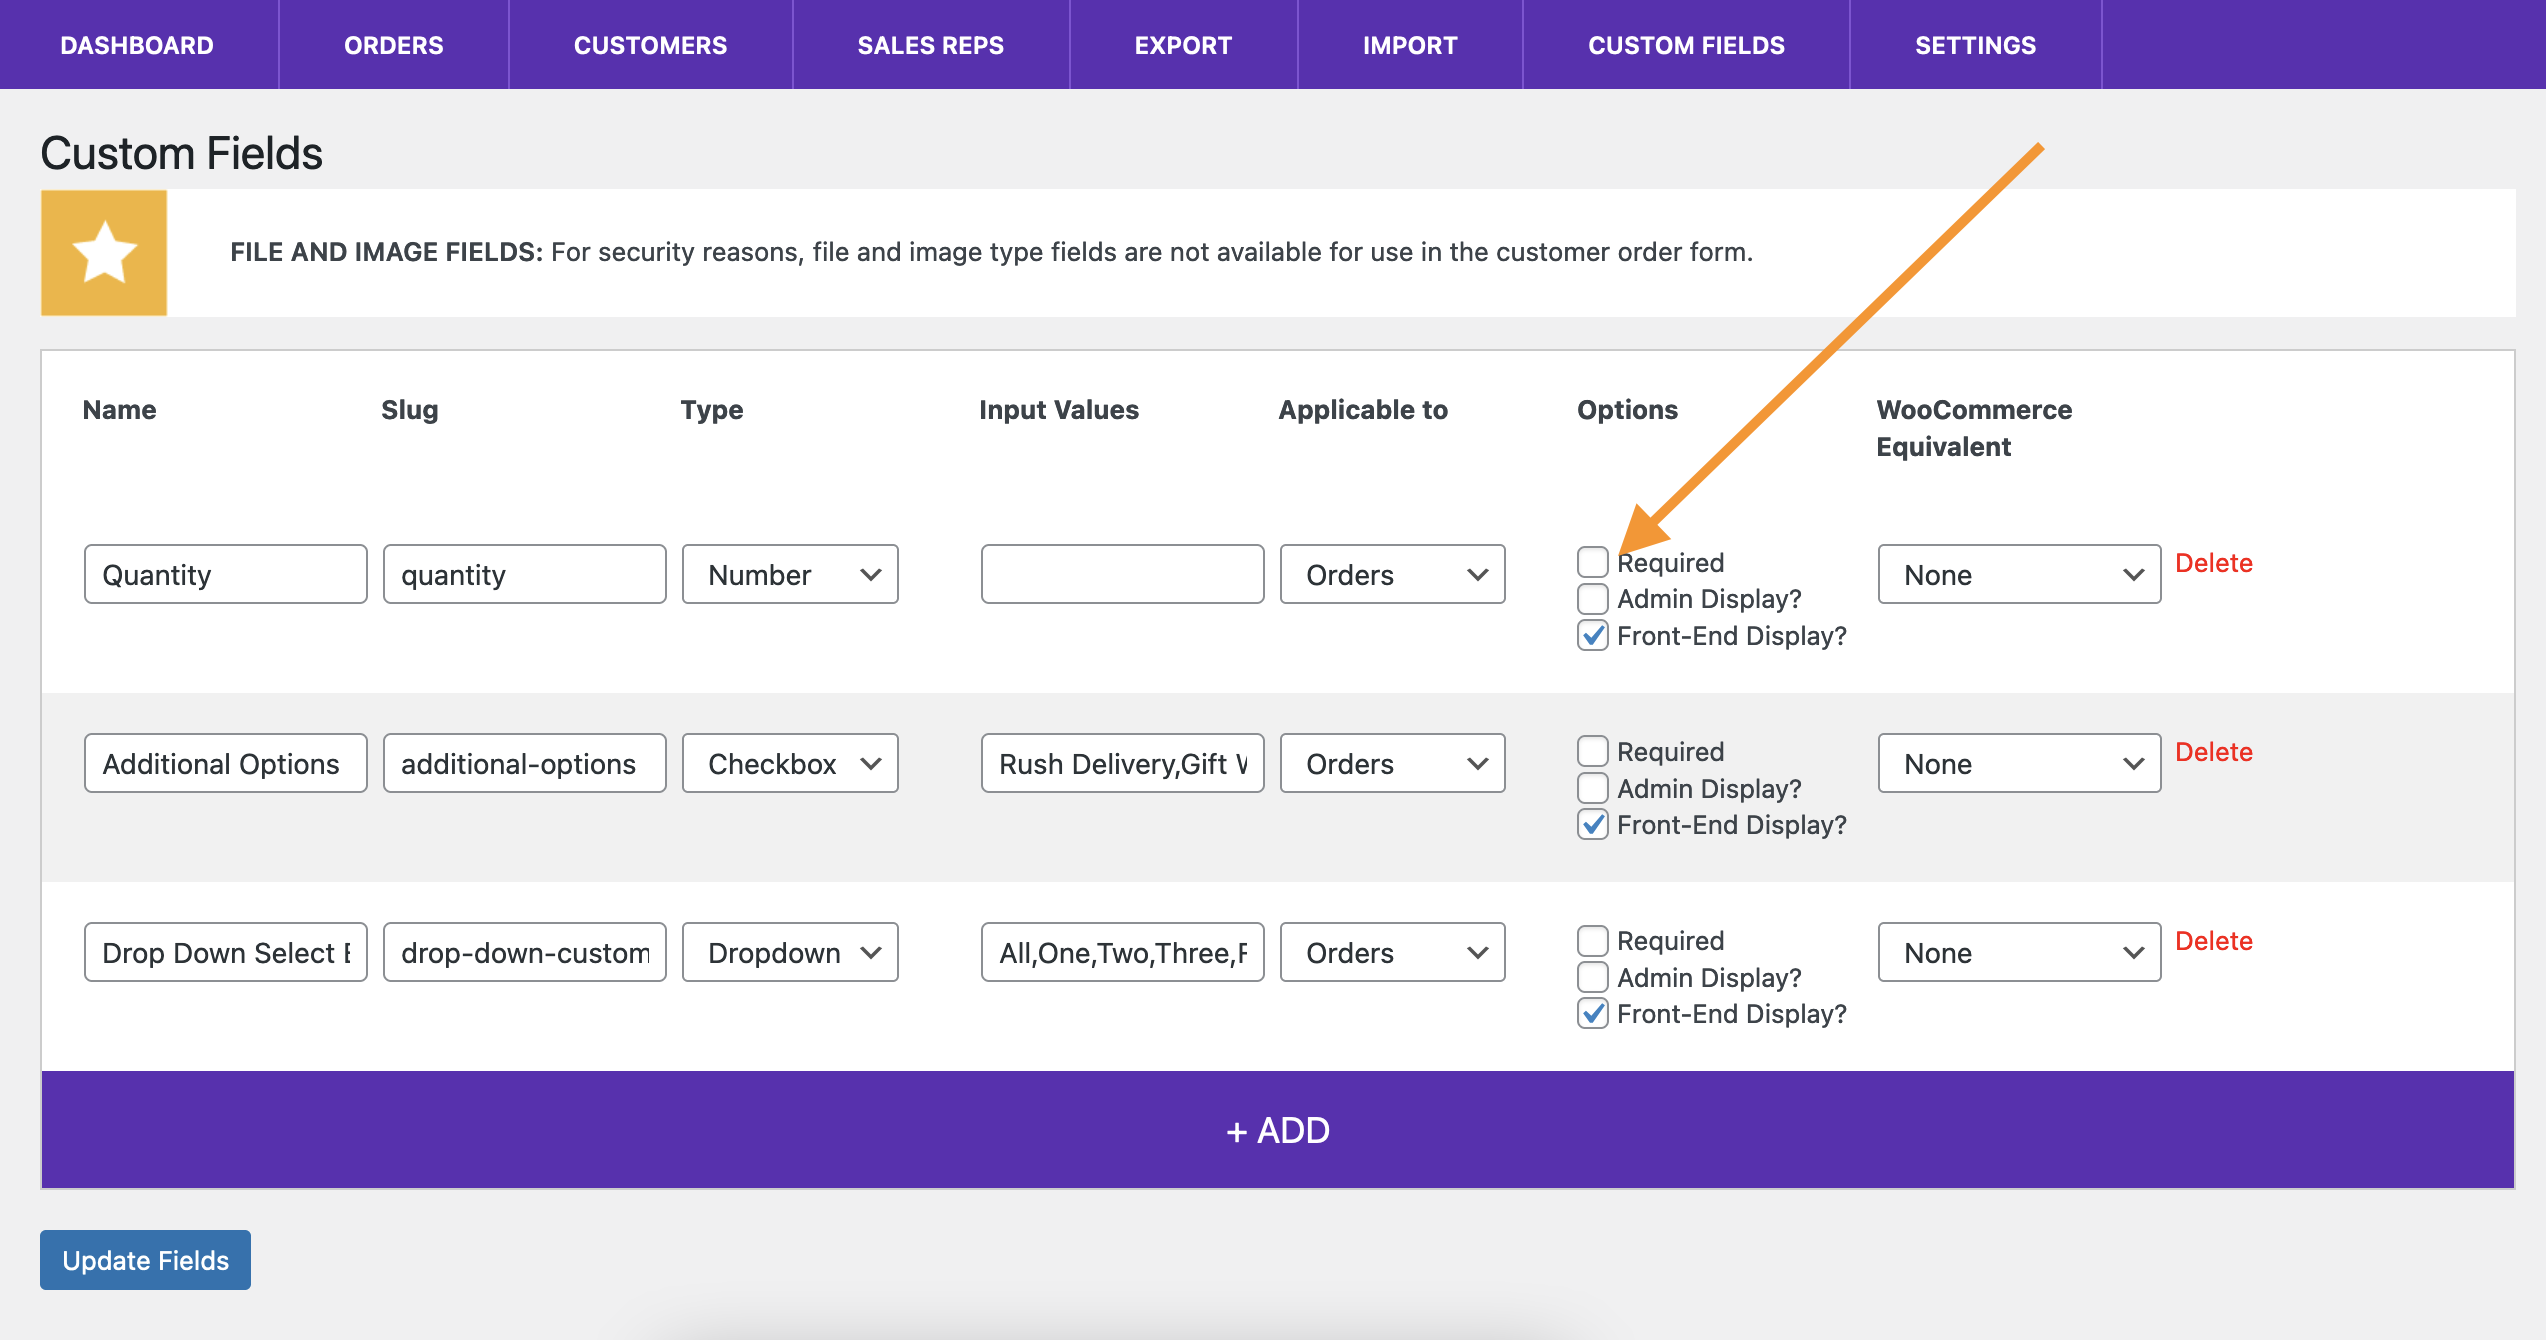
Any custom fields that you create will automatically show in the customer order form. You can make a field required by checking the Required box on the Custom Fields page in the admin