Now that you’ve created your notifications, this page will show you how you can link them to specific actions in the plugin.
Statuses
The main trigger for notifications in this plugin is status updates. As such, you need to assign a notification to each status. To do this, go to Settings > Statuses. For each created status, there is a dropdown that includes all the emails you created in this plugin, any emails you have created using the Ultimate WP Mail plugin and, if you’re using the ultimate version of the plugin, all the SMS messages you created .
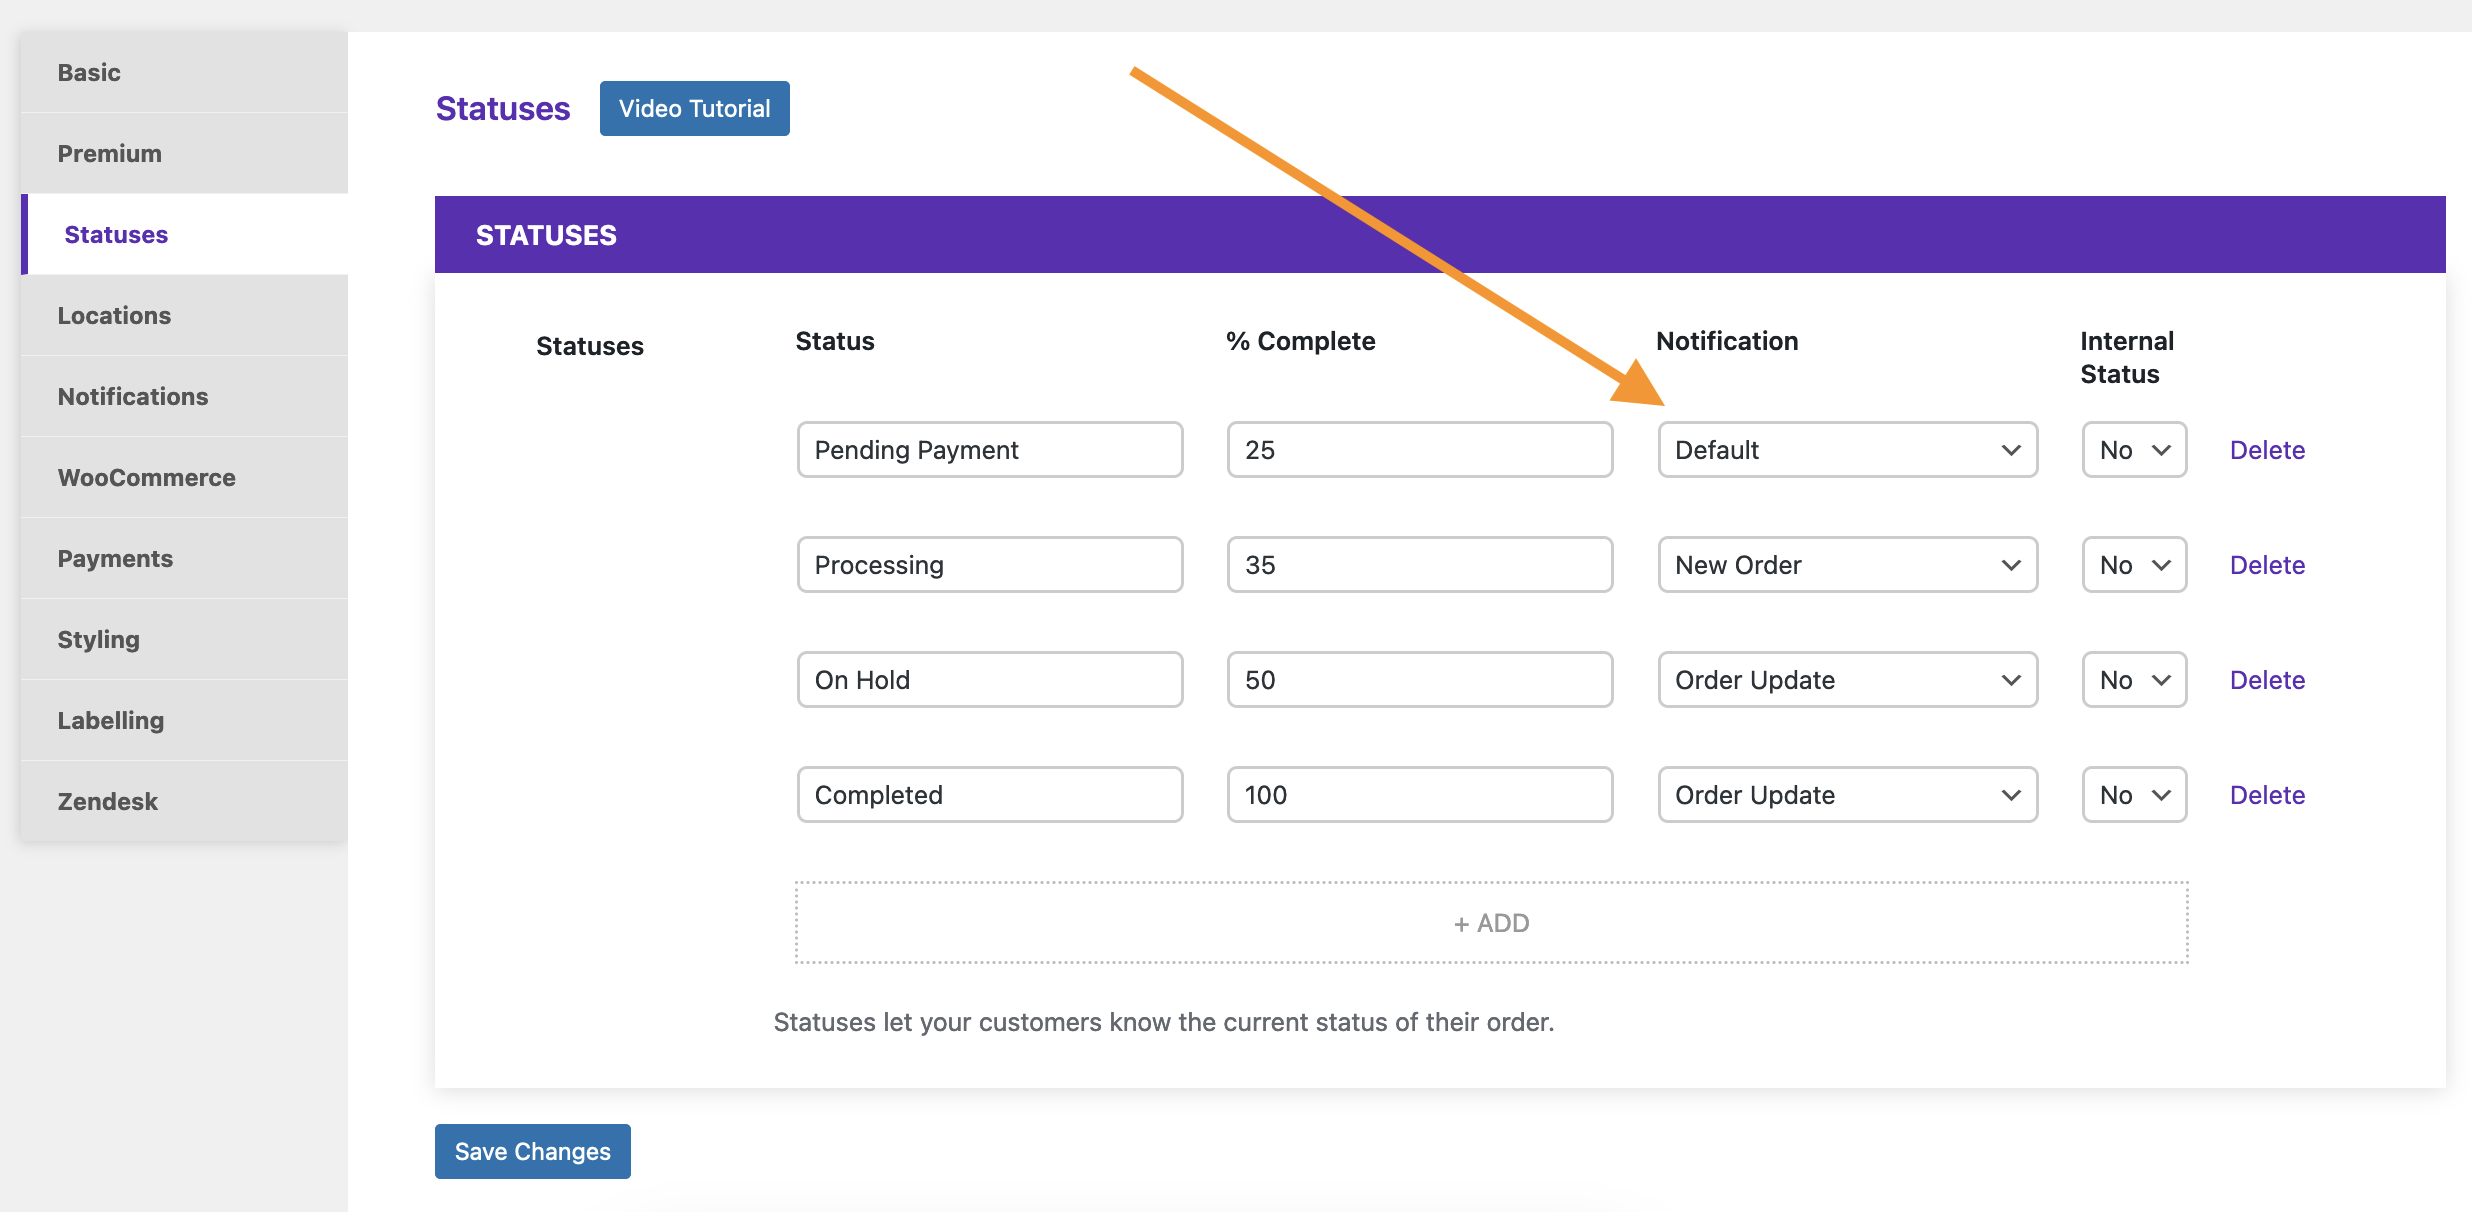
You can choose a different notification for each status or the same notification for several different statuses.
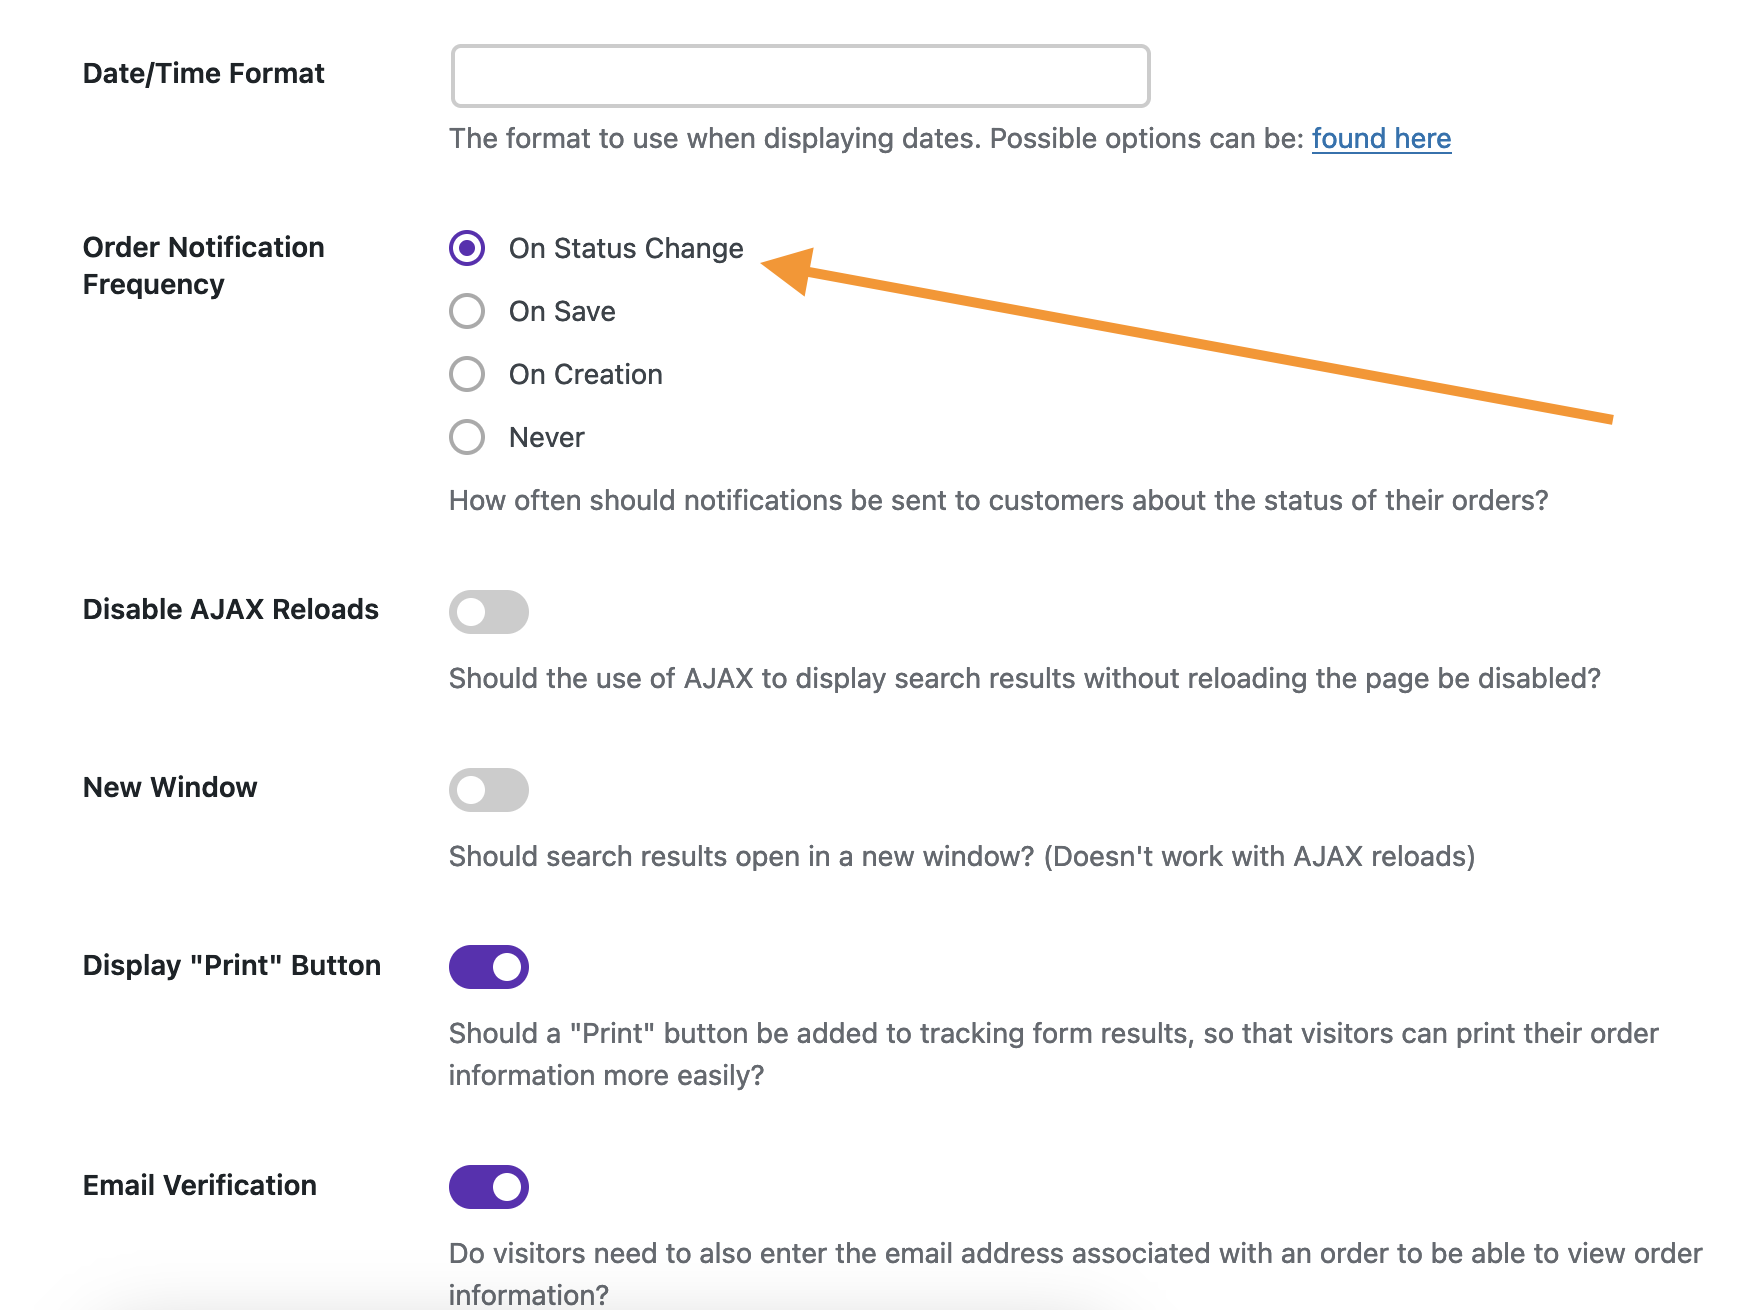
Note: There is one extra step to make sure your notifications get sent out on status update. If you go to the Settings > Basic page, there is an option called Order Notification Frequency. If you would like a notification to be sent out on every status update, then you need to set this to On Status Change. Otherwise, you can set it to send every time an order is saved, only when a new order is created or never.
Other Notifications
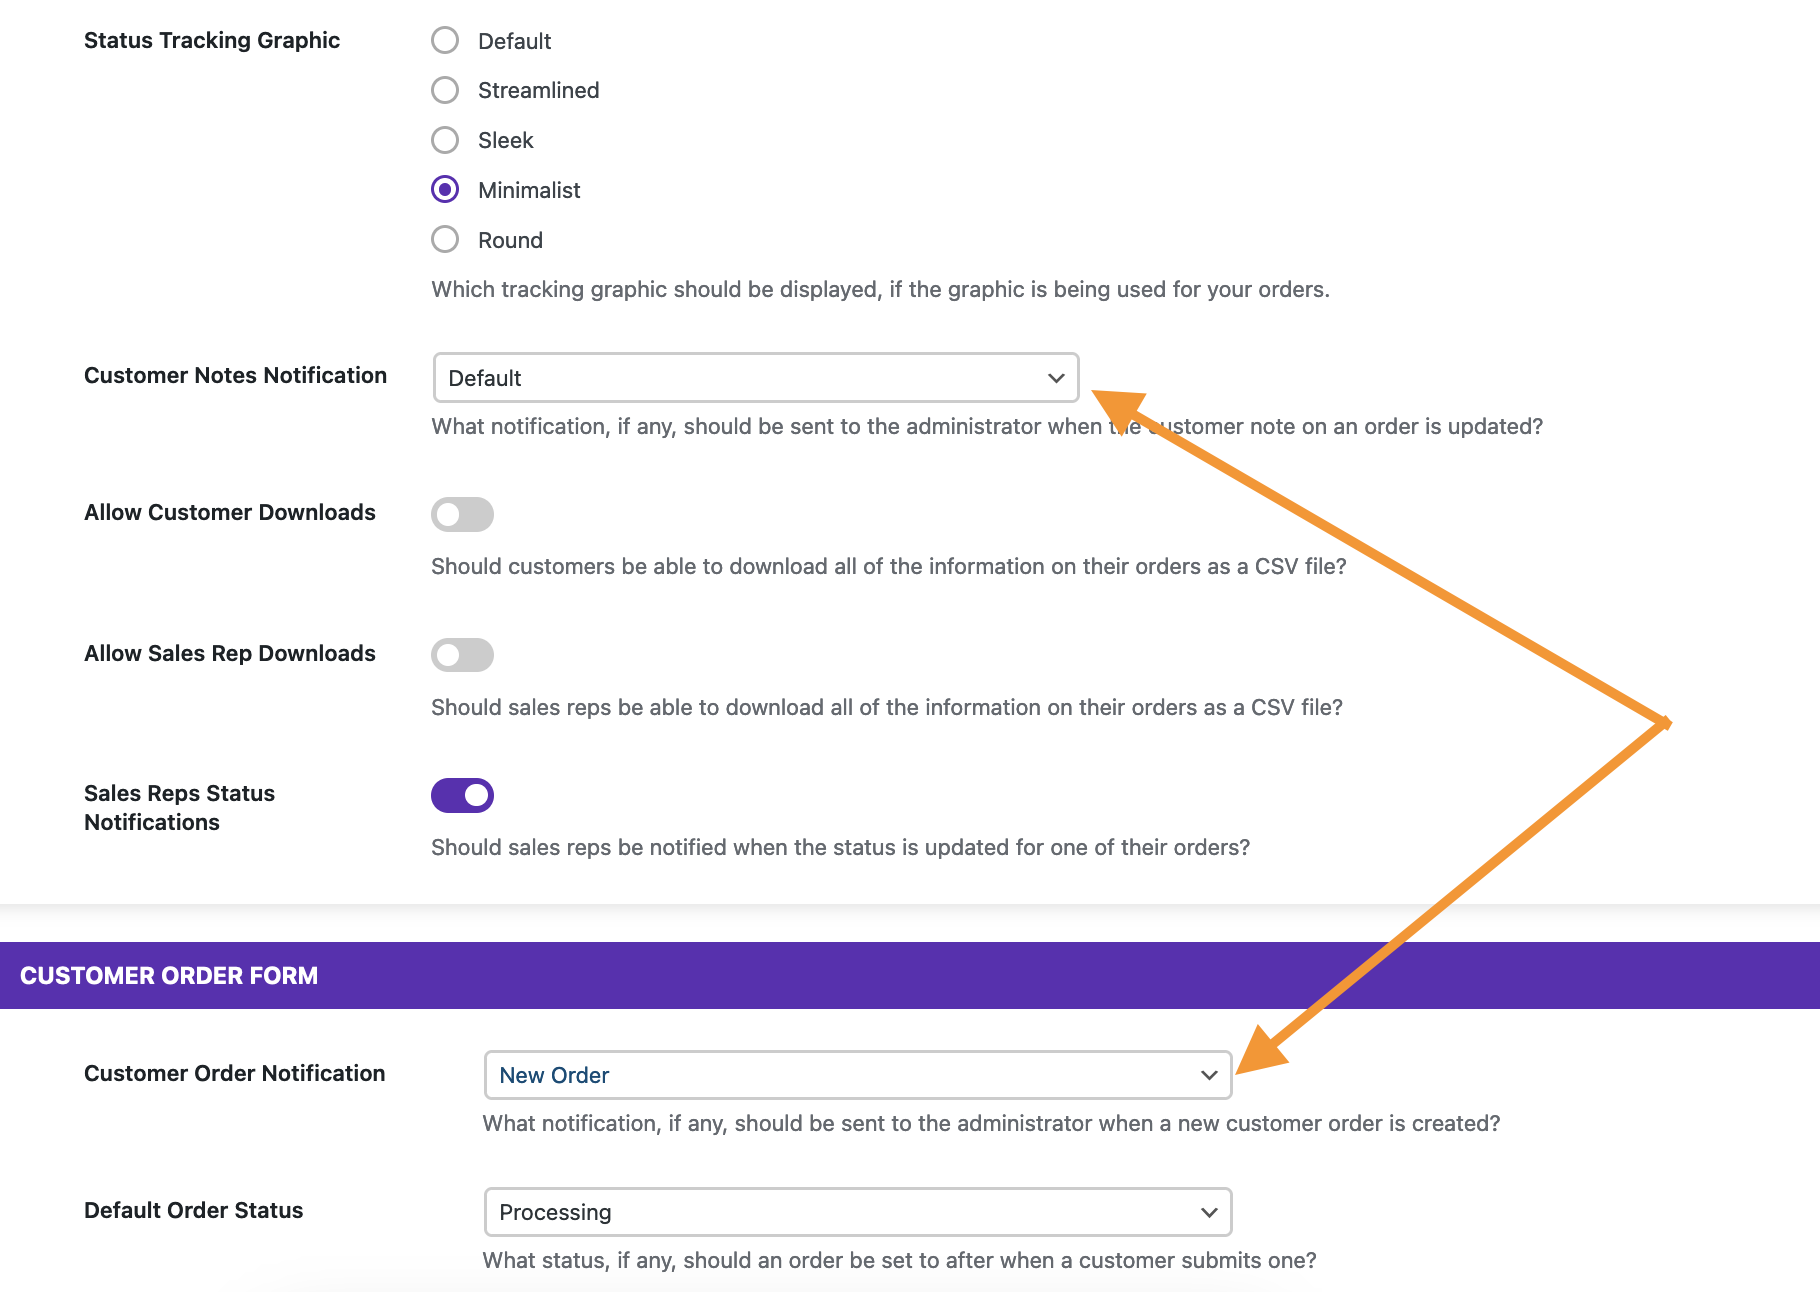
There are two other notification types available in the plugin and they are both for the admin. These can be found in the Premium area of the Settings page. As with the statuses, both can be either an email created in the plugin, an email created in Ultimate WP Mail or an SMS message.
-
Customer Notes Notification: Lets you choose which notification you want to send to the admin when the customer note is updated for an order.
-
Customer Order Notification: Lets you choose which notification you want to send to the admin when a new submission is received via the customer order form.
For both of these notifications, you can set the recipient admin email address and/or phone number in the Notifications area of the Settings page.